Studio lighting is an art form that requires precision, patience, and practice to master. A well-crafted lighting setup can elevate your photography game, make your subjects stand out, and add depth to your images. To create a professional lighting setup, it's essential to understand the fundamentals of studio lighting and how to work with different types of lights. Hidden Storage Ideas For A Clutter-Free Home Workspace
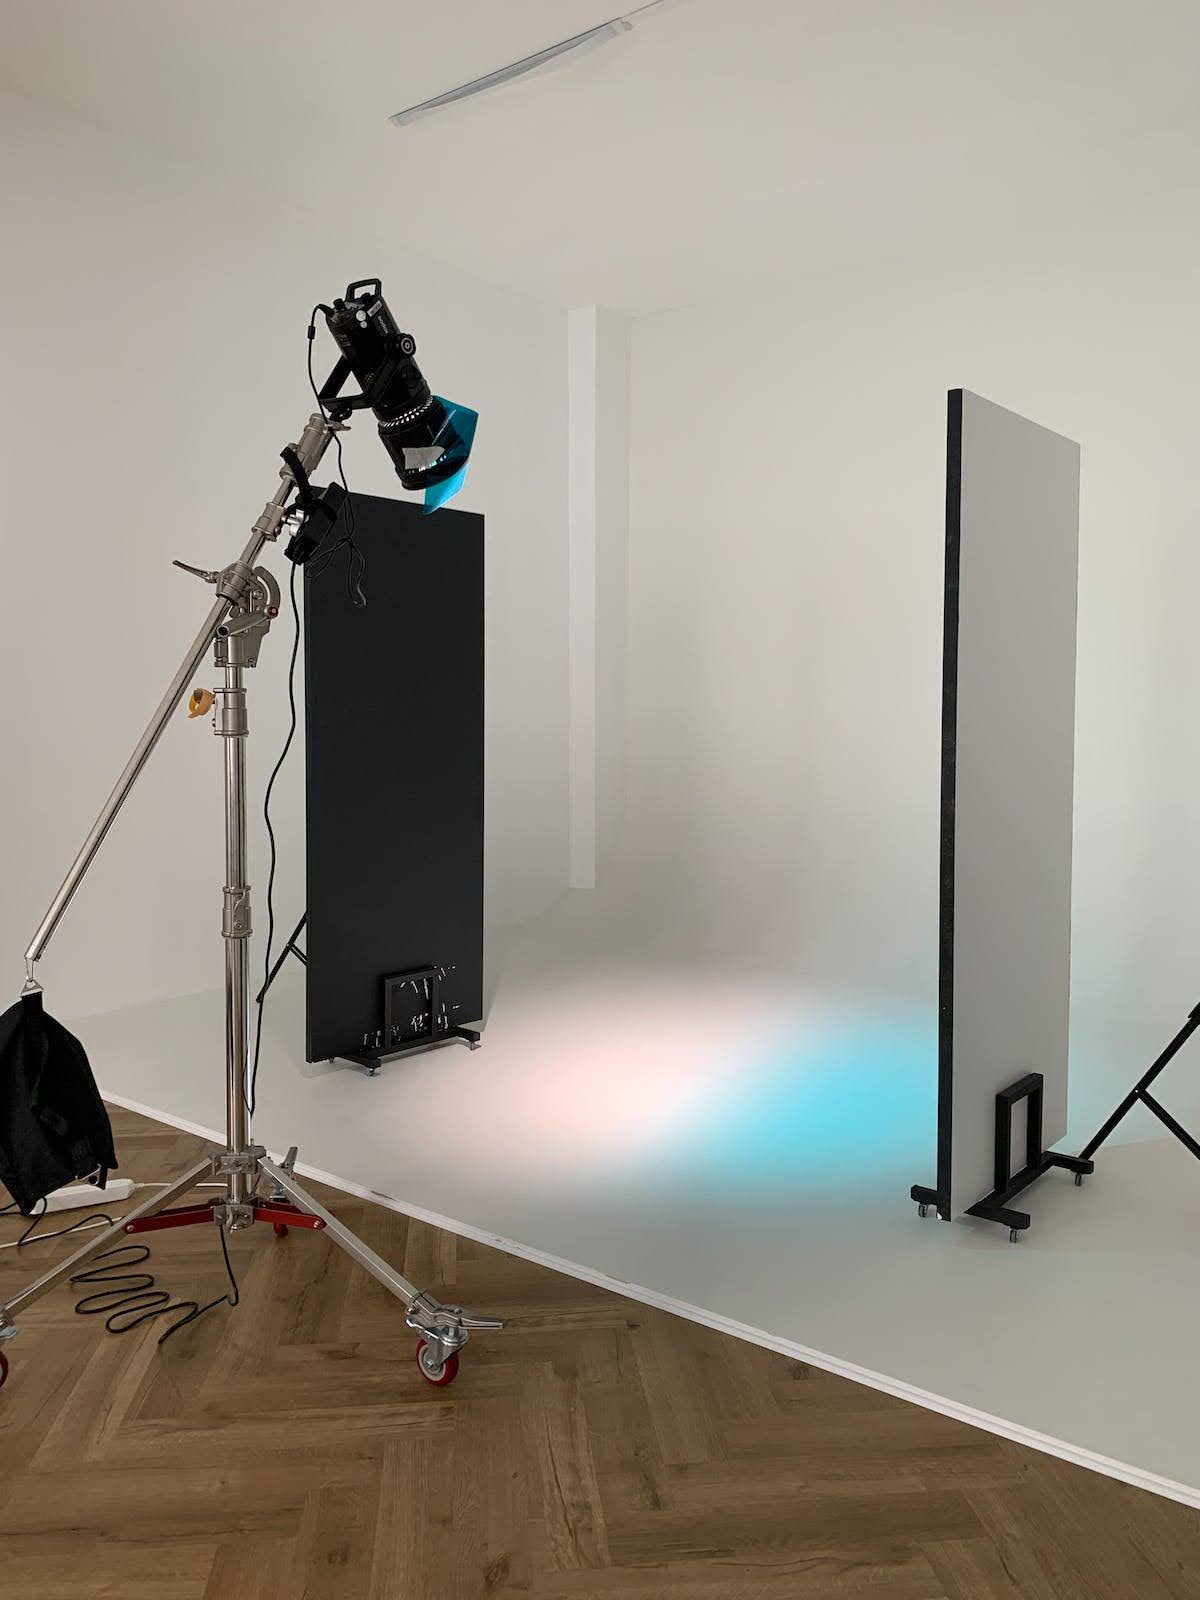
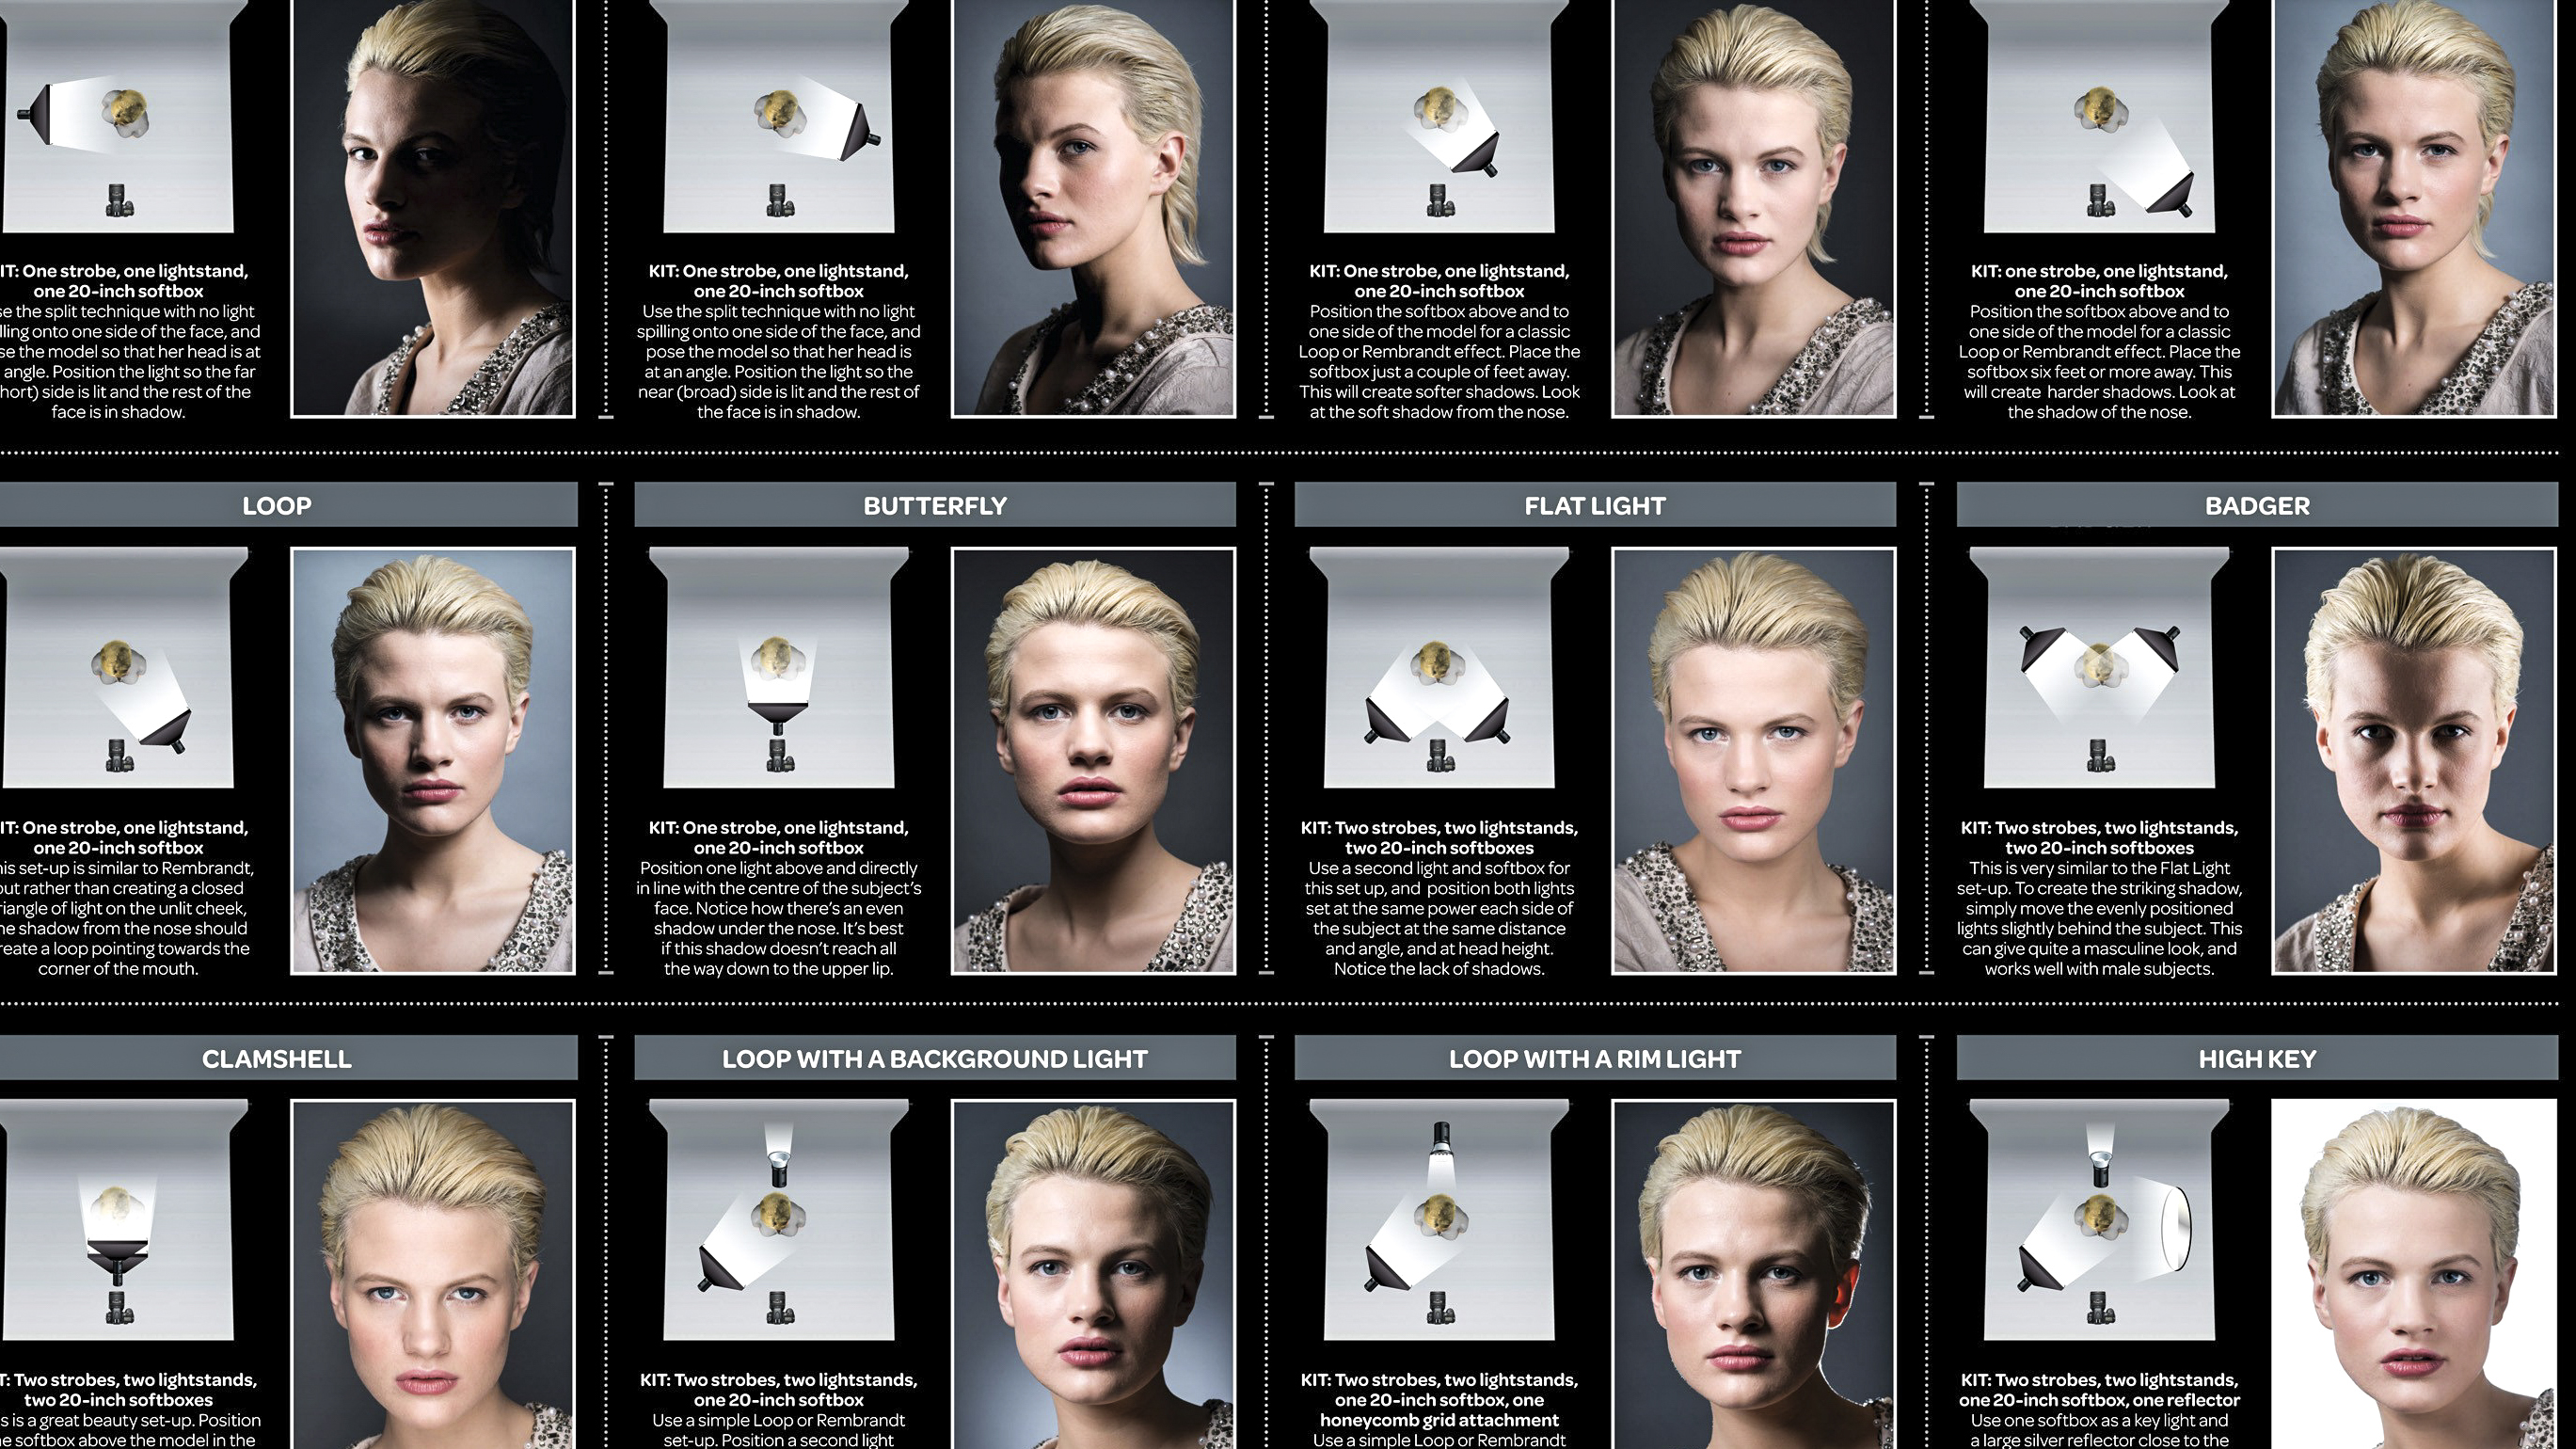
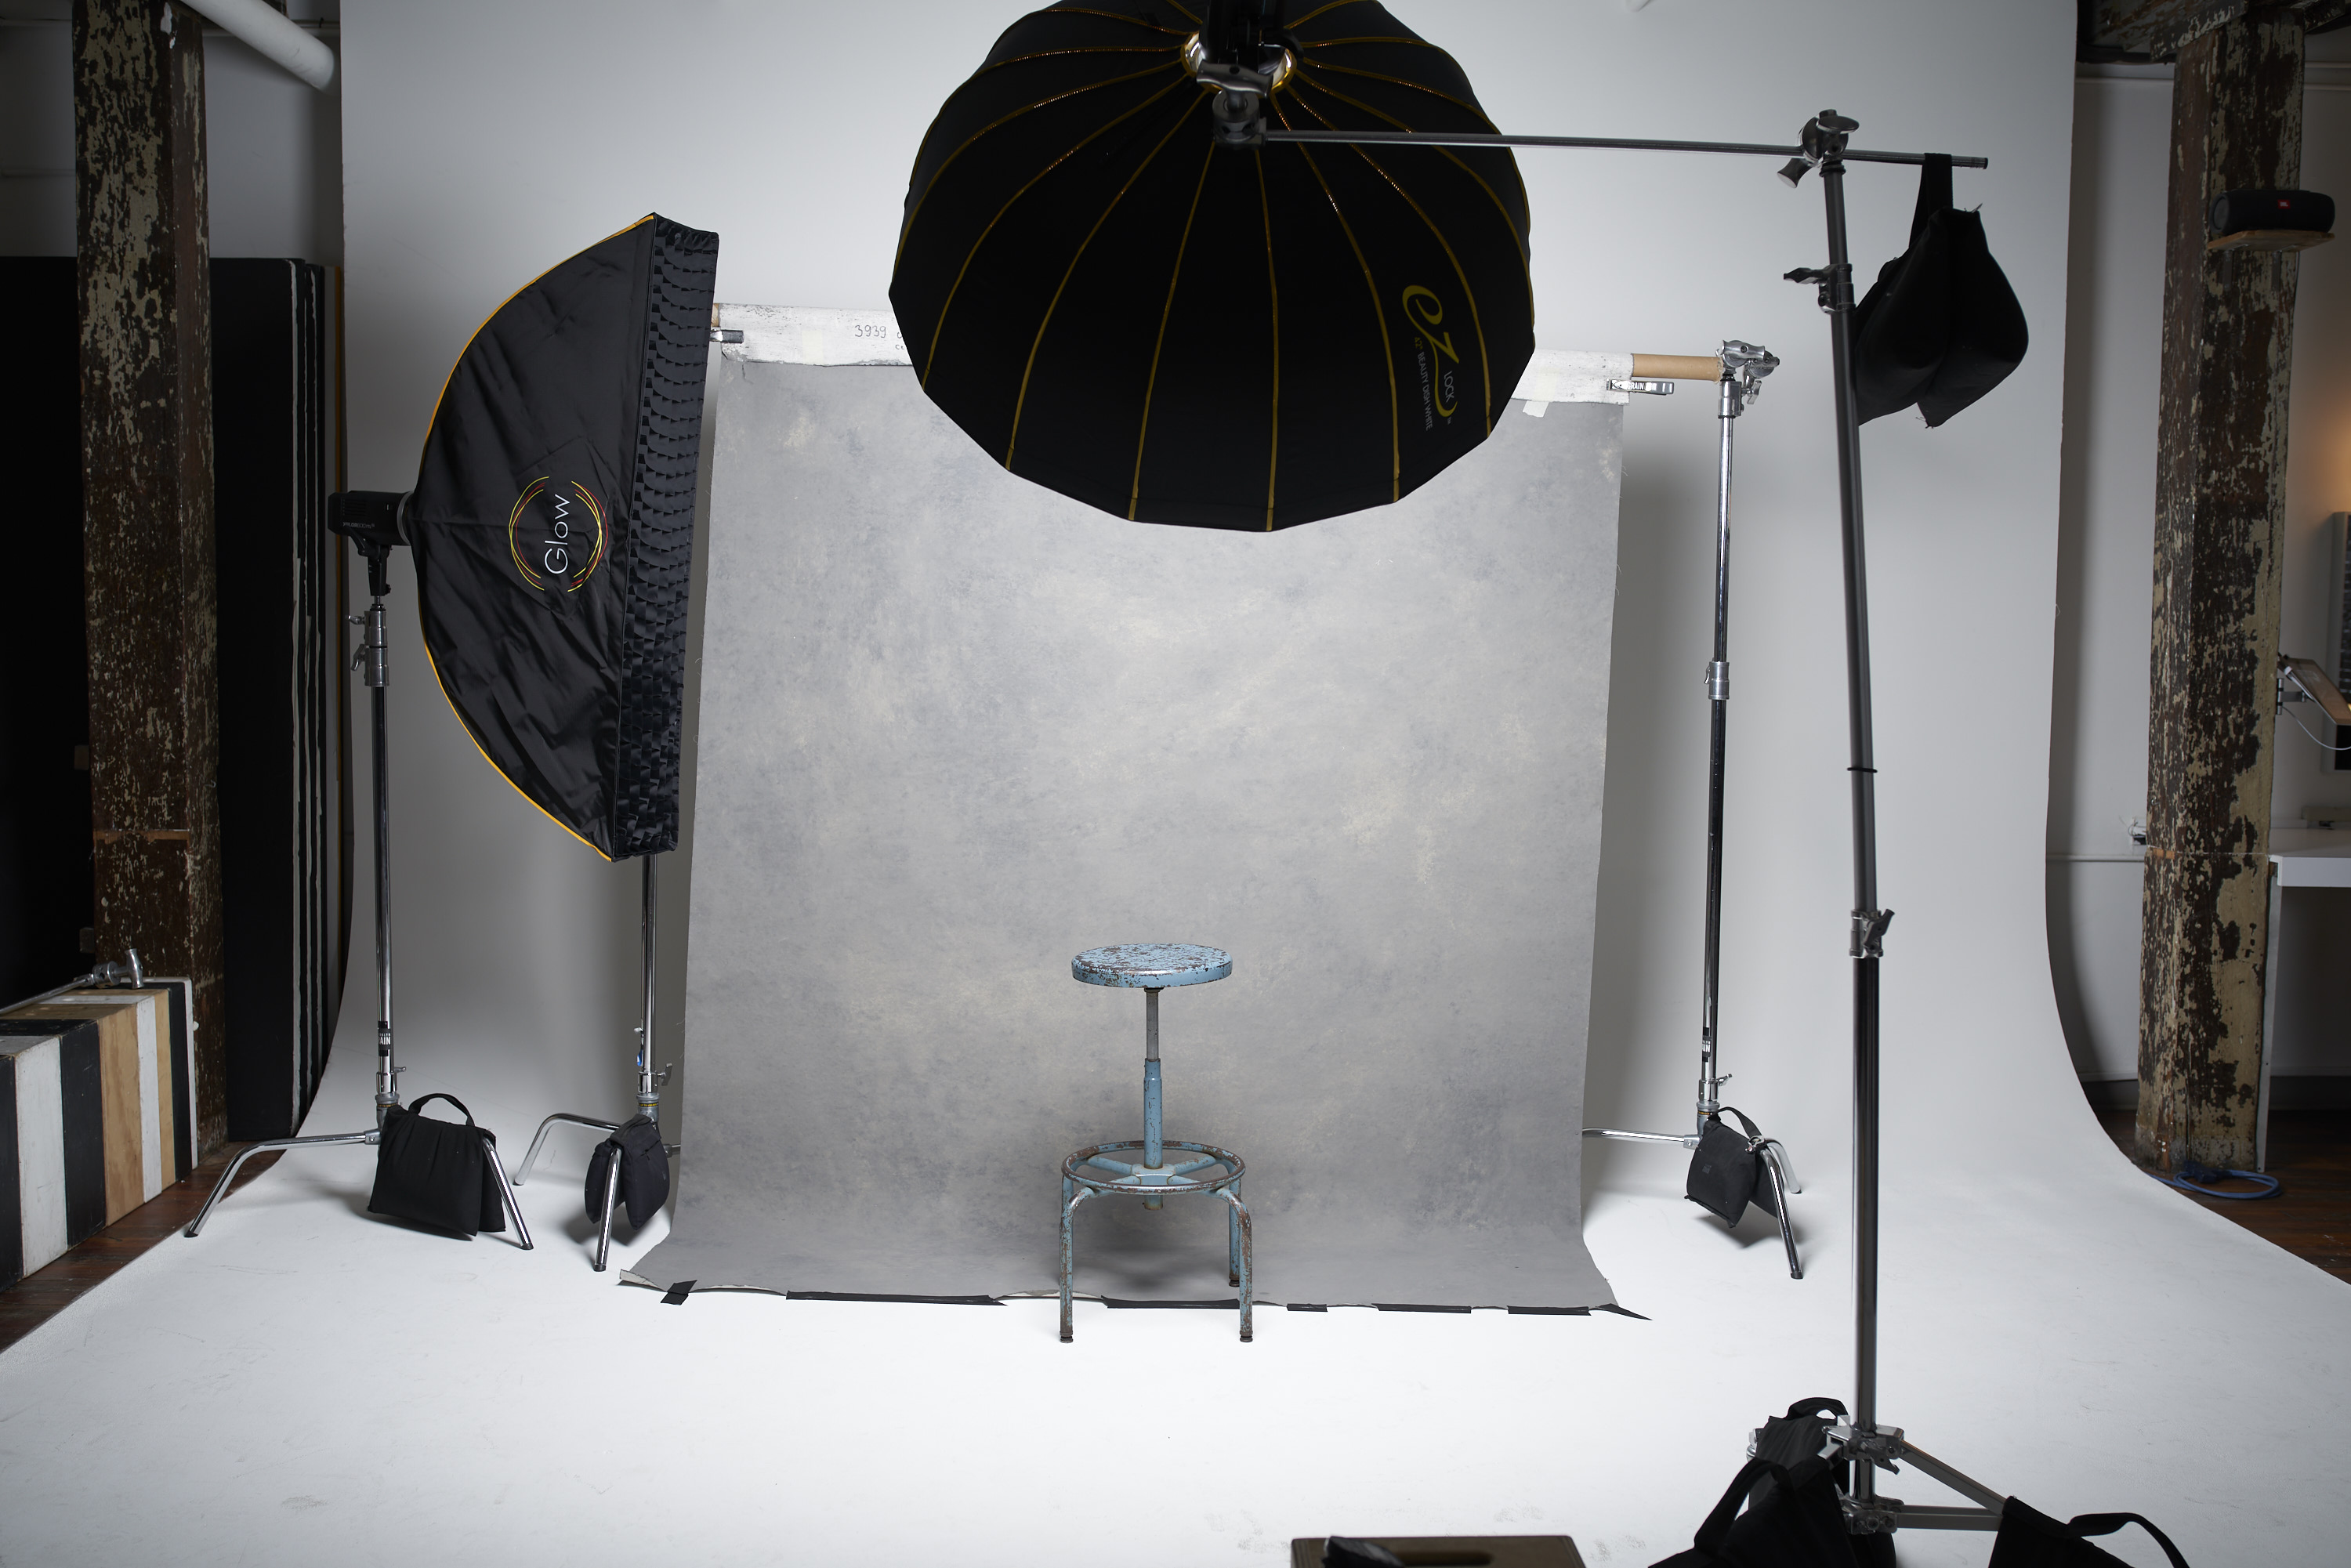
Softbox lights are a popular choice for studio lighting due to their ability to produce a soft, even light that minimizes harsh shadows. When setting up a softbox light, position it at a 45-degree angle to the subject, and adjust the light's height to create a flattering, natural-looking illumination. Consider using a light stand to suspend the softbox above the subject, allowing for maximum control and flexibility. To add dimension and interest to your images, incorporate multiple light sources into your setup.
A combination of softbox lights and umbrella lights can create a dynamic, high-contrast effect that draws the viewer's attention. 7 Creative Ways To Repurpose Old Furniture Into Desk Ideas Remember to adjust the lighting ratio to achieve the desired effect, taking into account the reflectivity of your subject and the background. When creating a professional lighting setup, attention to detail and a deep understanding of lighting principles are crucial. Experiment with different lighting setups and techniques to develop your unique style and voice, and don't be afraid to invest in quality equipment that will help you achieve the results you want.
With practice and patience, you'll be well on your way to creating stunning, professionally lit images that showcase your talent and artistic vision.